Maven is a build and project management tool, using this
tool we can automate build process steps in java project development. Maven
creates a project in standard way; it contains a 300+ rules and requirements.
In this example, explaining how to do a hello world Project
by using eclipse IDE and Maven
If you are new for Maven and eclipse IDE please check my
previous posts.
Creating Maven project
Click on File menu in eclipse IDE, under File menu -> new
-> Maven Project, find more on below Screen.

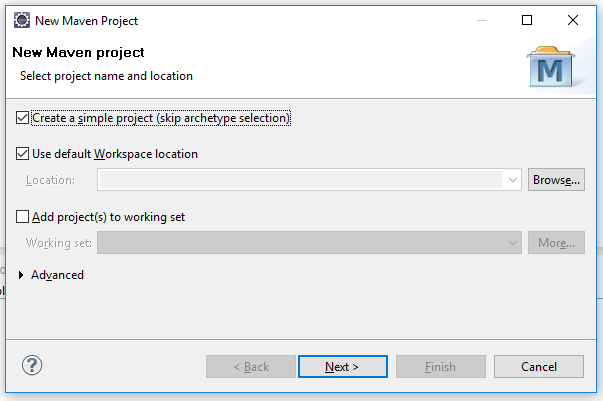
Selecting on Maven Project, we will get a popup with name
“New Maven Project”
Here click on “create a sample project” check box like and
click on Next button.
In this tab, IDE will ask few information about Project in Maven terminology
As per maven, Artifact
means information about the Projec.
Group id is a root package of
project
Artifact Id is a name of the project
Version is a identification of the
project release
Packaging is a type of the Project (jar is a Standalone project in java, war is a Web Application in Java).
As of now, ignore a Parent
Project information, we will discourse this thing in feature posts.
As per above discussion, filling detail like below screen

After filling required details, Click on Finish button, Maven will create a
project like below structure

Here, As per Maven standards,
1.
Create all Java file in src/main/java directory.
2.
Create all resource files like .properties, .xml
etc.. in src/main/resources directory.
3.
Create all the testing files like Junit file in
src/test/java directory.
4.
Create all the testing resources like JUnit
related .properties files and .xml files in src/test/resources
5.
pom.xml file for configuring or adding
dependencies (Jar files) into project.
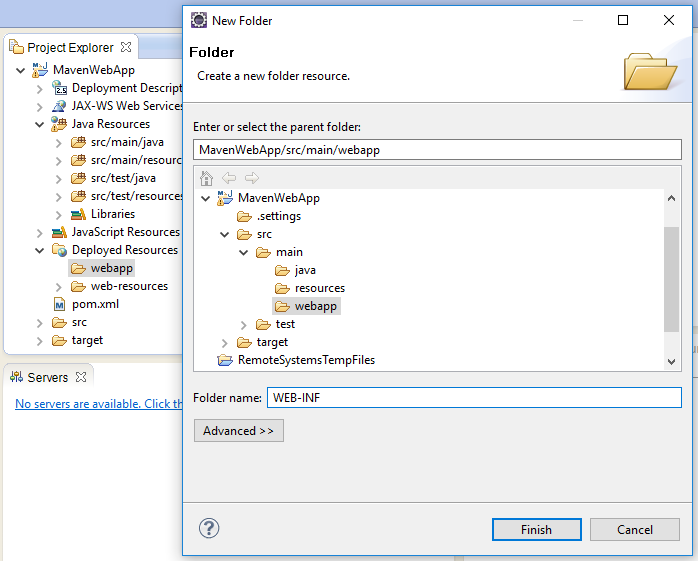
Note: After creation of Maven
project with eclipse IDE, WEB-INF folder and web.xml file is available
automatically in Old version of Maven plug-in, but in new version of Maven
plug-in WEB-INF folder and web.xml file is not available, because now a days,
new projects deployment is developing with annotations.
If you are developing project with
configuration files like web.xml file, then you need to create a WEB-INF folder
and web.xml file manually in webapp directory as per Sun microsystem standards.
In this example I am developing
project with web.xml, and am creating structure, follow the below steps
For creating WEB-INF folder:
Right click on webapp folder ->
new -> Folder
For creating web.xml file:
Right click on WEB-INF folder
-> new -> other -> search for xml file and select XML file and click
on Next button, give file name as web.xml. Click on Finish button.

Creating Servlet Class in project:
Right
click on src/main/java -> new -> Class (selecting on Class option,
eclipse will ask information about Class name and Package, so fill with
required details and click on Finish button, as per below example
MainServlet.java file is available in src/main/java)


Creating jsp in project:
Right click on WEB-INF folder
-> new -> other -> in Wizards search, search for “jsp” (In Web package
jsp file option is available) and select JSP file option and click on Next
button, here eclipse will ask for jsp file name, enter jsp file name and click
on Finish button. In the below example I have given jsp file name is welcome-gurugubellitech.jsp
file name
Project structure after creation
of required files:

<?xml version="1.0" encoding="UTF-8"?>
<web-app xmlns:xsi="http://www.w3.org/2001/XMLSchema-instance"
 xmlns="http://java.sun.com/xml/ns/javaee" xmlns:web="http://java.sun.com/xml/ns/javaee"
 xsi:schemaLocation="http://java.sun.com/xml/ns/javaee http://java.sun.com/xml/ns/javaee/web-app_3_0.xsd"
 version="3.0">
 <servlet>
  <servlet-name>GurugubelliTech</servlet-name>
  <servlet-class>com.gurugubellitech.MainServlet</servlet-class>
 </servlet>
 <servlet-mapping>
  <servlet-name>GurugubelliTech</servlet-name>
  <url-pattern>/gurugubelliTech</url-pattern>
 </servlet-mapping>
</web-app>
package com.gurugubellitech;

import java.io.IOException;

import javax.servlet.ServletException;
import javax.servlet.http.HttpServlet;
import javax.servlet.http.HttpServletRequest;
import javax.servlet.http.HttpServletResponse;

public class MainServlet extends HttpServlet{

 /**
  *
  */
 private static final long serialVersionUID = 1L;

 @Override
 protected void doGet(HttpServletRequest request, HttpServletResponse response)
   throws ServletException, IOException {
  System.out.println("Hi, Gurugubelli Technologies");
  System.out.println("I am redirecting to you, welcome-qurugubellitech.jsp file");

  response.sendRedirect("welcomegurugubellitech.jsp");
 }
}
<%@ page language="java" contentType="text/html; charset=ISO-8859-1"
    pageEncoding="ISO-8859-1"%>
<!DOCTYPE html PUBLIC "-//W3C//DTD HTML 4.01 Transitional//EN" "http://www.w3.org/TR/html4/loose.dtd">
<html>
<head>
<meta http-equiv="Content-Type" content="text/html; charset=ISO-8859-1">
<title>Welcome to Gurugubelli Technologies</title>
</head>
<body>
<center>
 <h1>Hi, Welcome to Gurugubelli Technologies....</h1>
</center>
</body>
</html>
<project xmlns="http://maven.apache.org/POM/4.0.0" xmlns:xsi="http://www.w3.org/2001/XMLSchema-instance"
 xsi:schemaLocation="http://maven.apache.org/POM/4.0.0 http://maven.apache.org/xsd/maven-4.0.0.xsd">
 <modelVersion>4.0.0</modelVersion>
 <groupId>com.gurugubellitech</groupId>
 <artifactId>MavenWebApp</artifactId>
 <version>0.0.1-SNAPSHOT</version>
 <packaging>war</packaging>
 <dependencies>
  <!-- https://mvnrepository.com/artifact/org.apache.tomcat/tomcat-jsp-api -->
  <dependency>
   <groupId>org.apache.tomcat</groupId>
   <artifactId>tomcat-jsp-api</artifactId>
   <version>9.0.1</version>
  </dependency>

  <!-- https://mvnrepository.com/artifact/org.apache.tomcat/tomcat-servlet-api -->
  <dependency>
   <groupId>org.apache.tomcat</groupId>
   <artifactId>tomcat-servlet-api</artifactId>
   <version>9.0.1</version>
  </dependency>

 </dependencies>
</project>
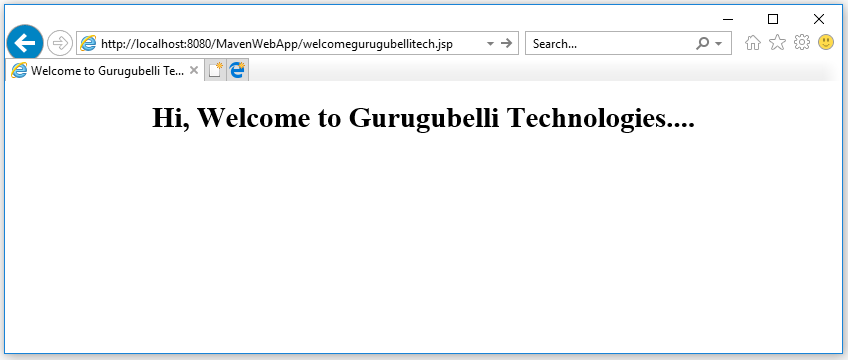
Testing Application:
Deploy application in tomcat server and access application
using below url
Using this url your servlet will redirect to
welcomegurugubellitech.jsp file and will get below page.
Note: In pom.xml file, I have used tomcat-9.0 server and using
tomcat implementation jsp and servlet jar maven dependencies.
If you are using any other server, you can update jsp and
servlet jar maven dependencies with corresponding server implementations.
How to create a Maven project in eclipse IDE
 Reviewed by Gurugubelli Technologies
on
November 26, 2017
Rating:
Reviewed by Gurugubelli Technologies
on
November 26, 2017
Rating:
Reviewed by Gurugubelli Technologies
on
November 26, 2017
Rating:


No comments: